


Guide to Creating and Assigning Fanpage Admin Management Permissions for Businesses
In the digital age, a Facebook Fanpage is an extremely important tool that helps businesses connect with customers and build brands. However, as businesses grow, managing a Fanpage can become complex, especially as the number of employees increases. Assigning administrative permissions will help businesses divide work more efficiently and securely. Let's find out how to create and assign Fanpage management permissions on Facebook in detail below!
Creating a Facebook Fanpage for Your Business
The first step to building a brand on Facebook is to create a Fanpage for your business. Here is a simple and easy process to follow:
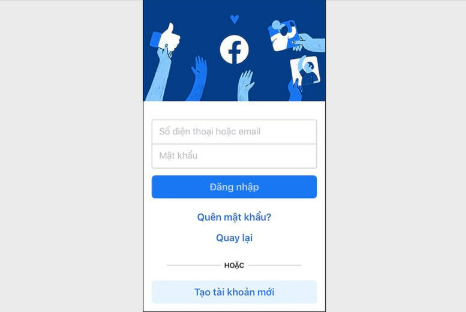
Step 1: Log In to Facebook
Open your browser and log in to your personal Facebook account.
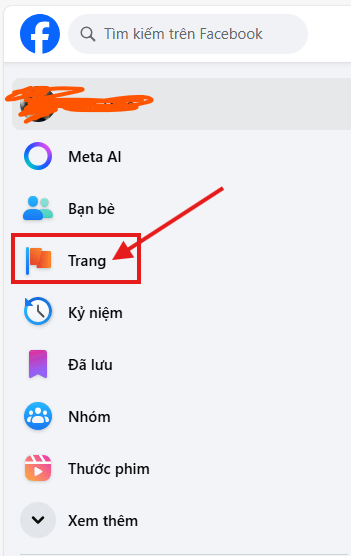
Step 2: Create a Fanpage
After logging in, you can go to the "Create Page" section from the menu in the upper right corner of the screen.
Step 3: Choose Page Type
Facebook offers different page type options. To represent a business, select "Business or Brand" and fill in the required information.
Step 4: Enter Business Information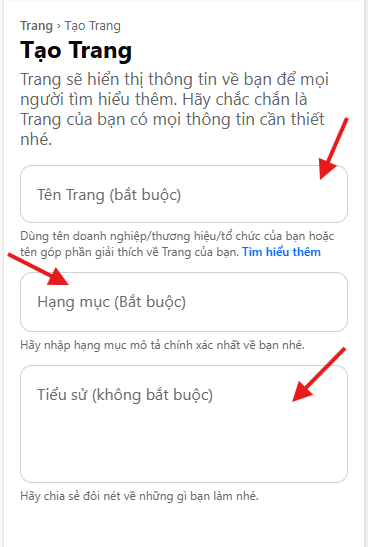
Provide the page name, choose a relevant category (e.g., online store, consulting services), along with contact information such as address and phone number.
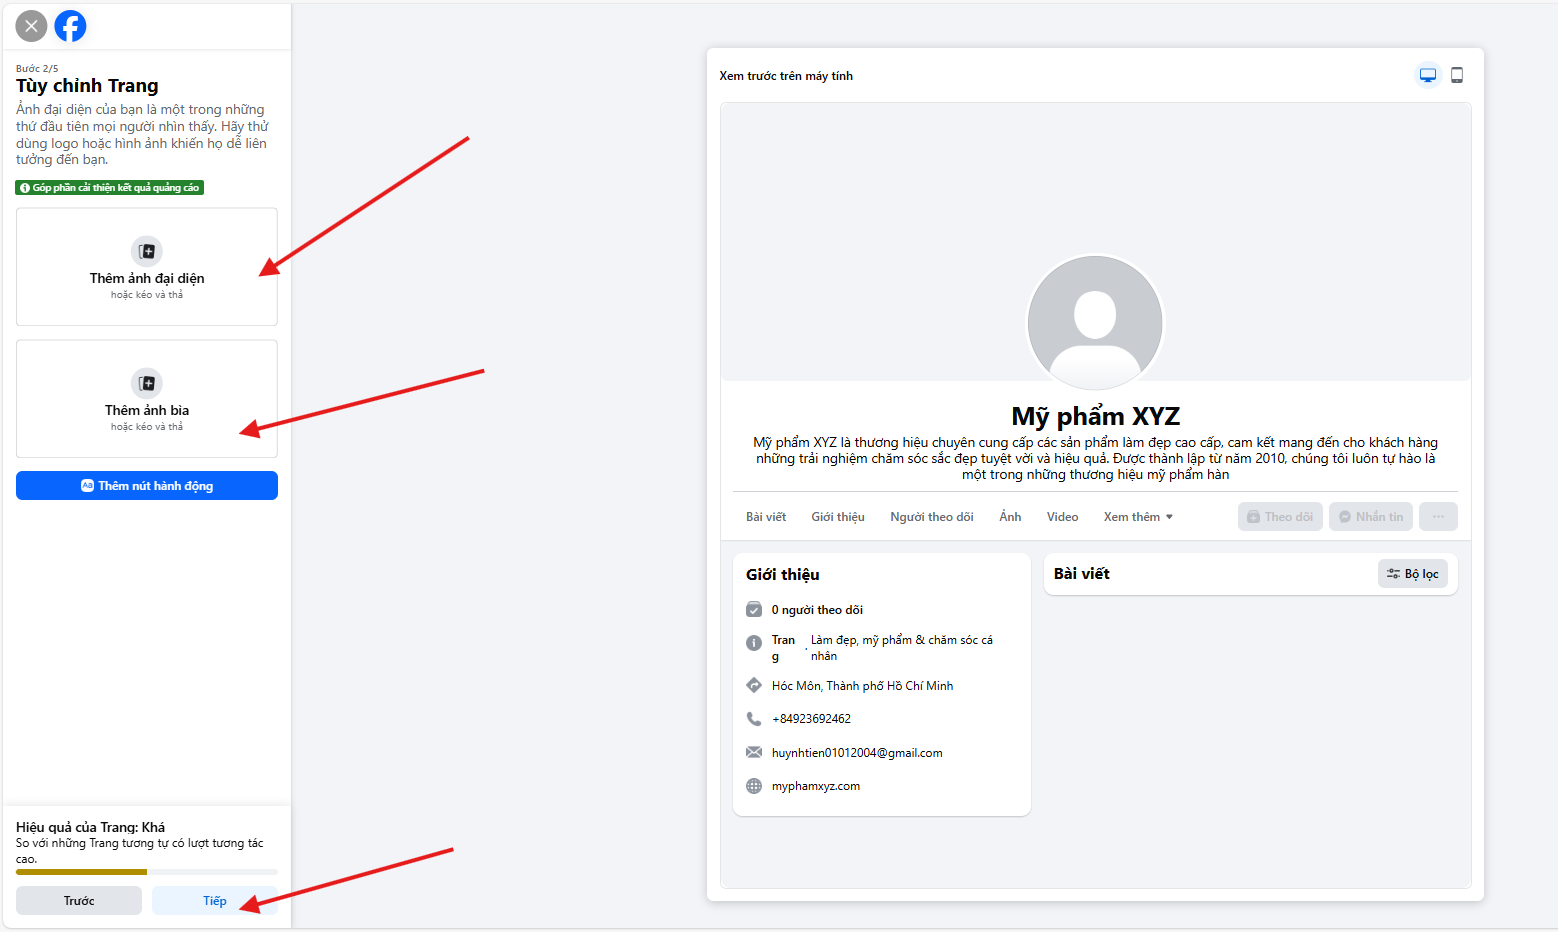
Step 5: Add Images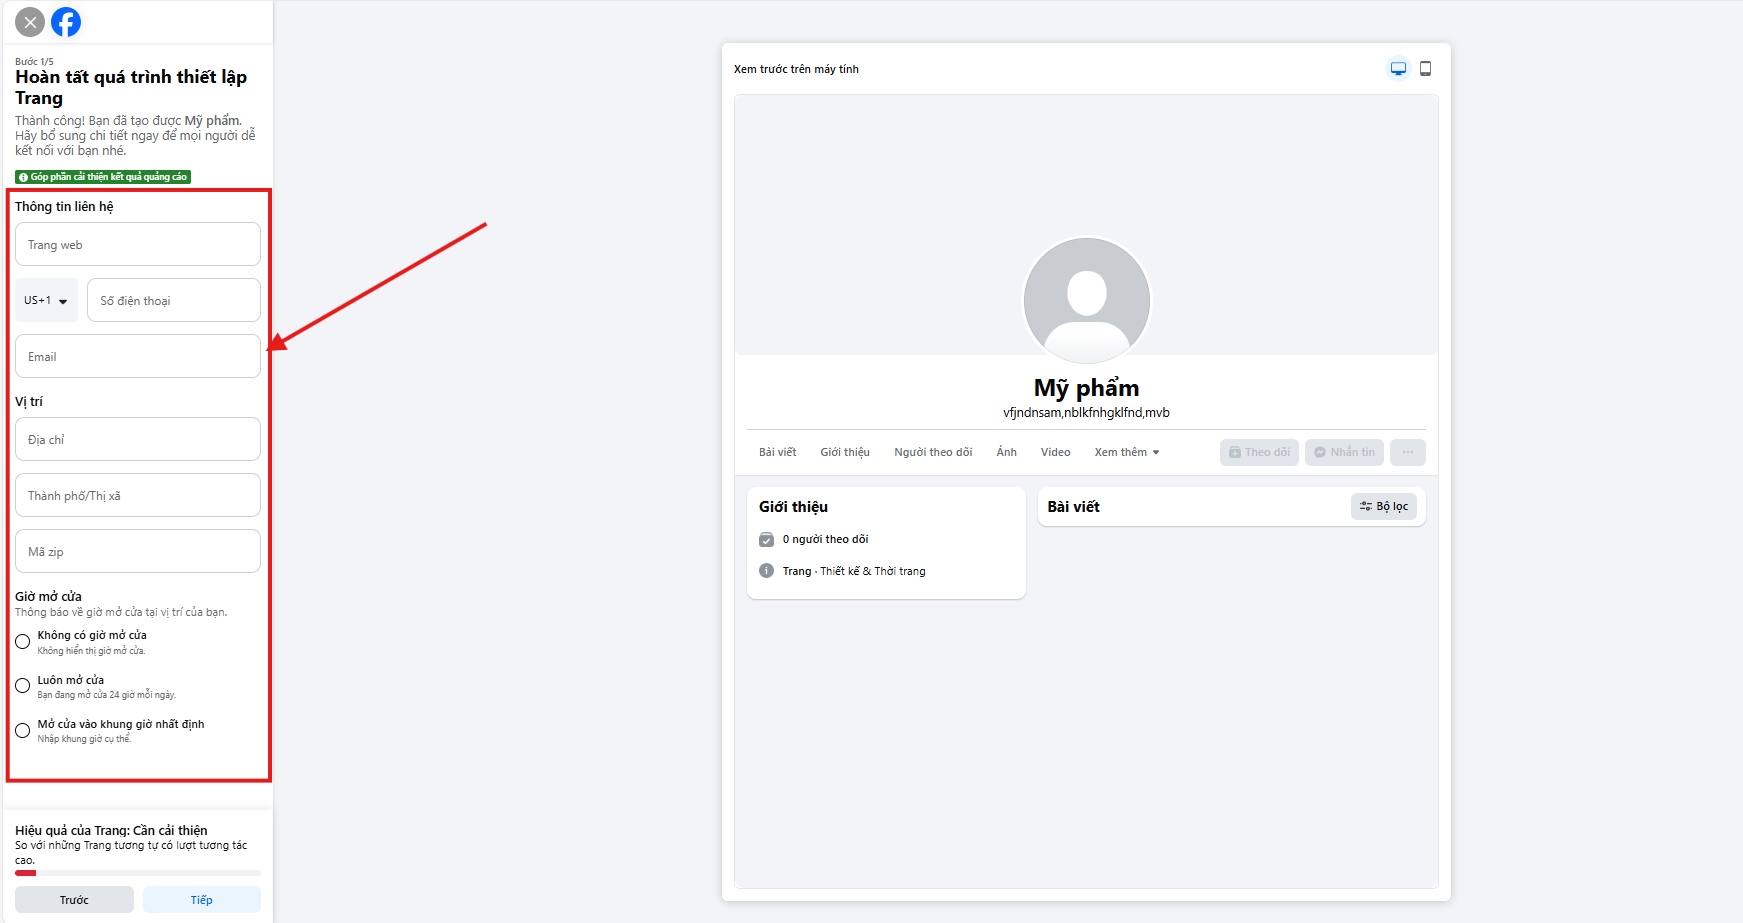
To make the Fanpage professional and easy to recognize, upload a profile picture (business logo) and a cover photo (an image reflecting your products or services).
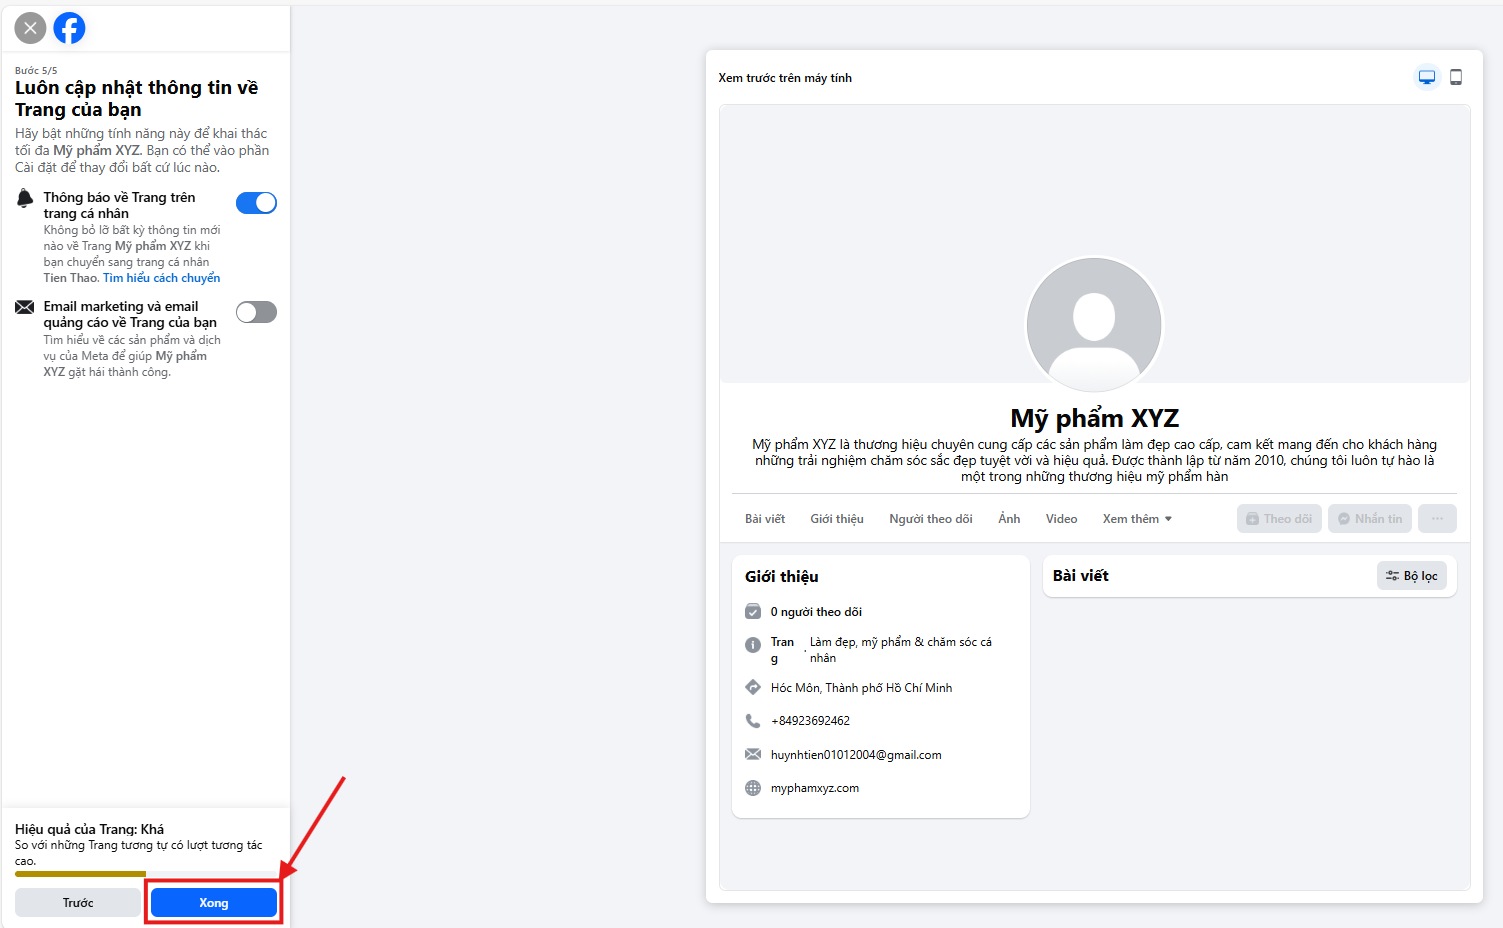
Step 6: Complete Fanpage Creation
After filling in all the information, click "Create Page" to complete the creation of the Fanpage for your business.
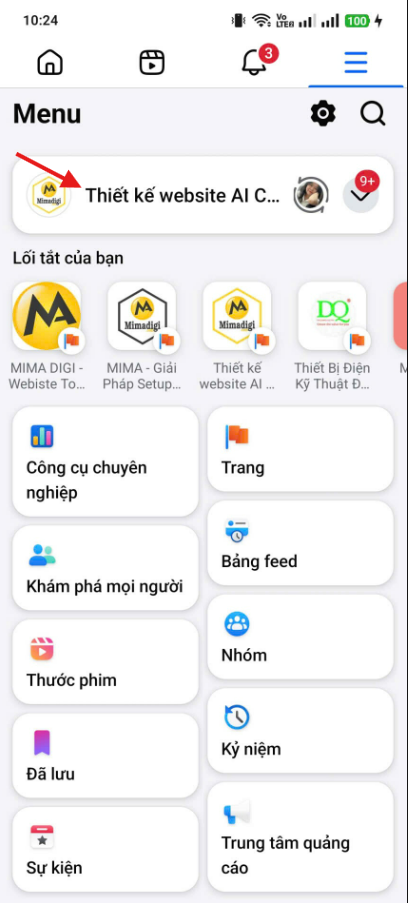
Assigning Fanpage Management Permissions
After creating the page, you need to assign permissions to members of your team to manage the Fanpage effectively. Facebook offers different roles, from administrator to editor, to help divide tasks clearly.
Fanpage Management Roles
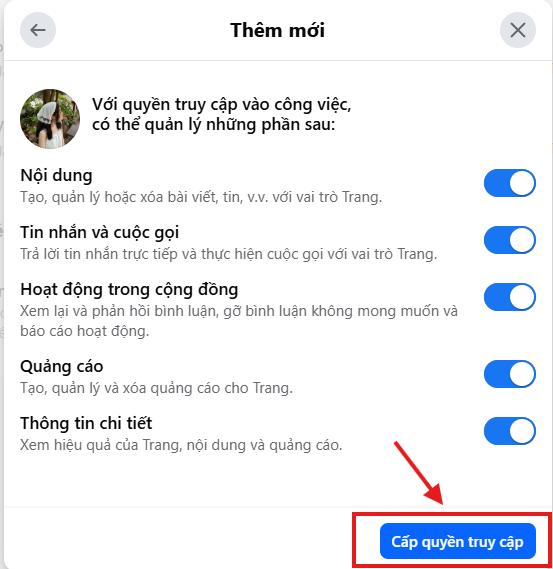
- Administrator (Admin): Administrators have full rights on the page, including the ability to change settings, assign permissions to others, and manage all content and advertising.
- Editor (Editor): Editors can create and edit posts, but do not have the right to change settings or assign permissions to others.
- Advertiser (Advertiser): This person can only create and manage advertising campaigns, but cannot edit posts or change page settings.
- Content Creator (Content Creator): This person can post and manage content on the page, but cannot change settings or advertising.
Assigning Fanpage Management Permissions on a Computer
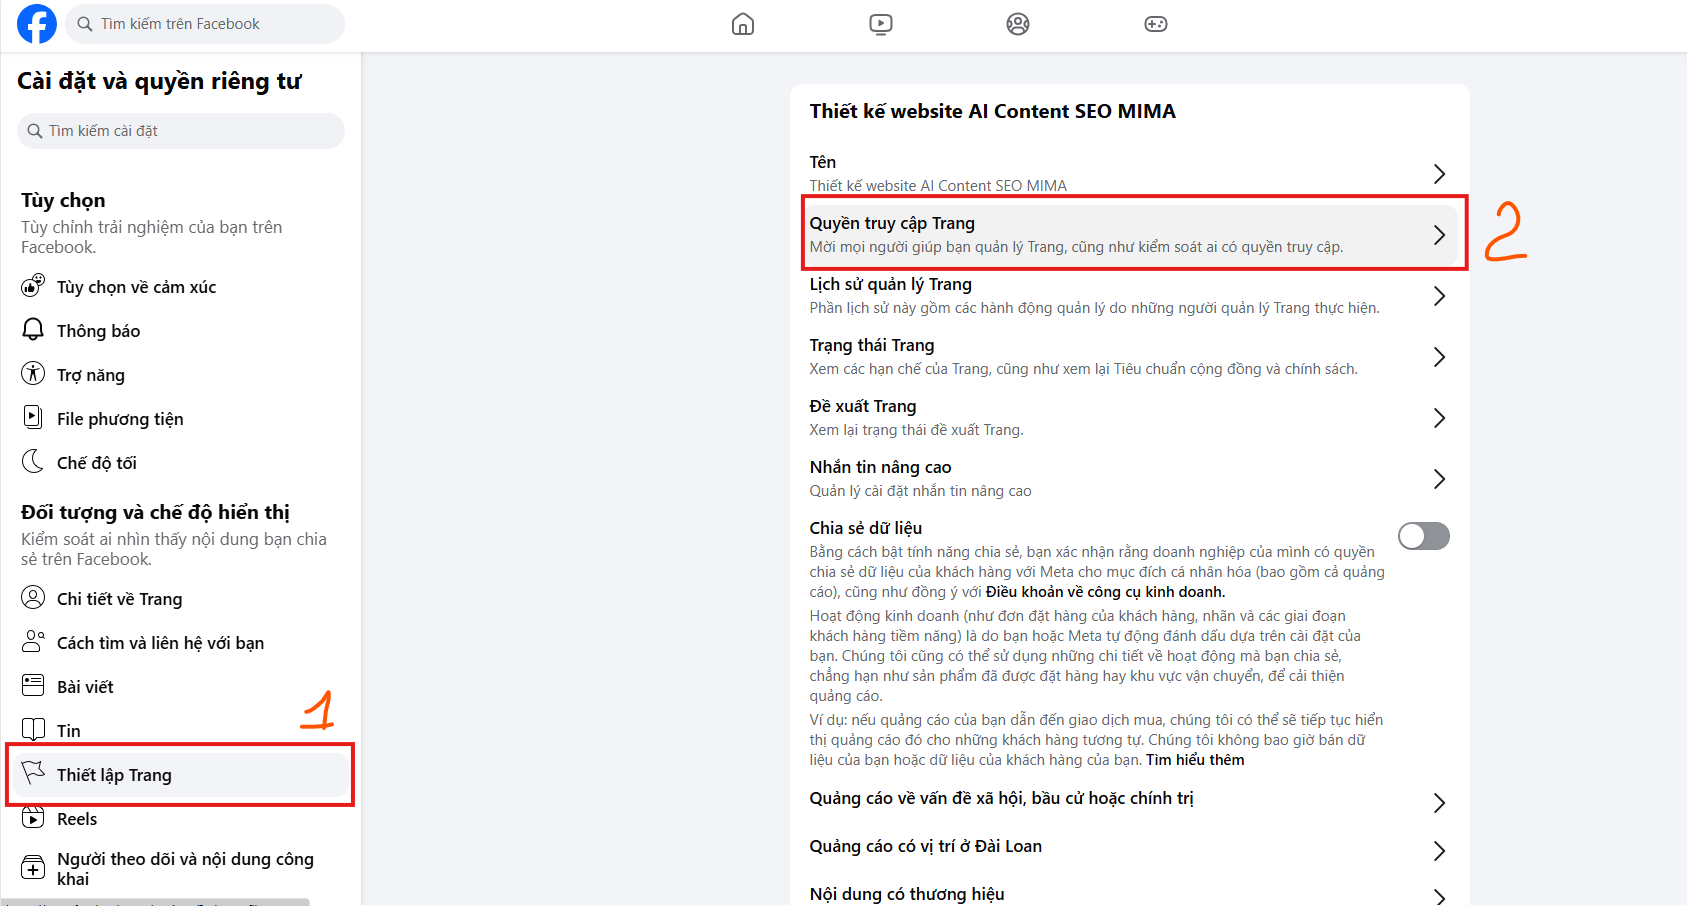
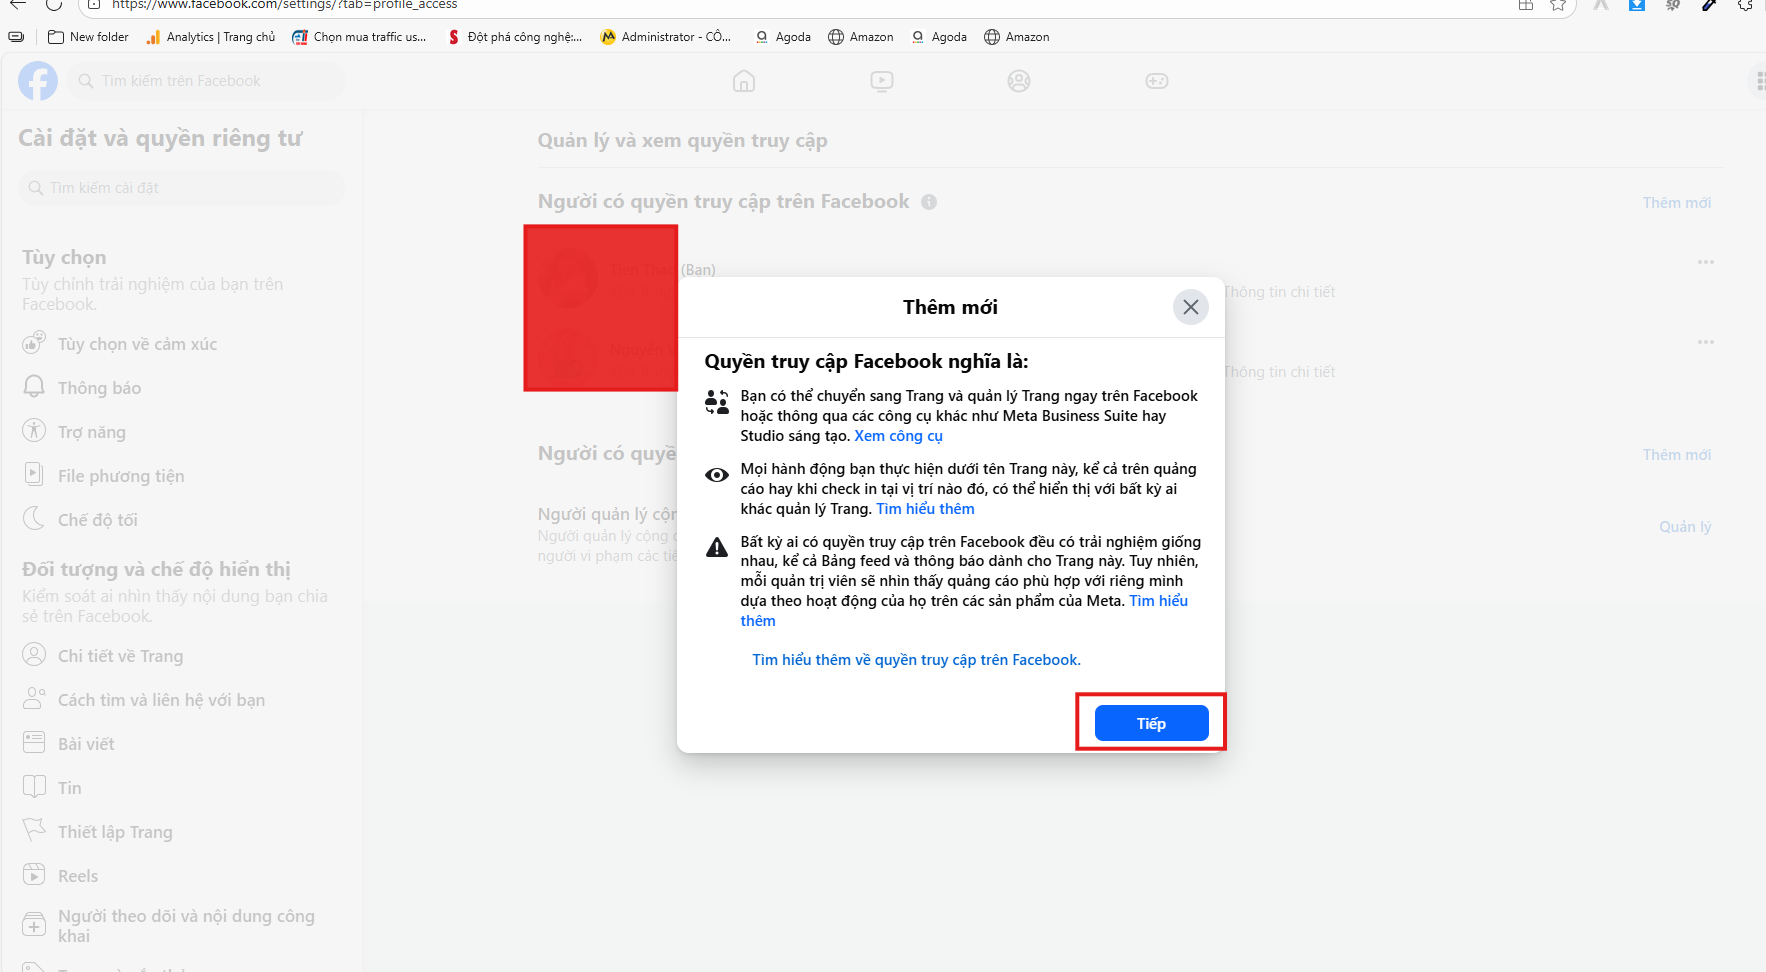
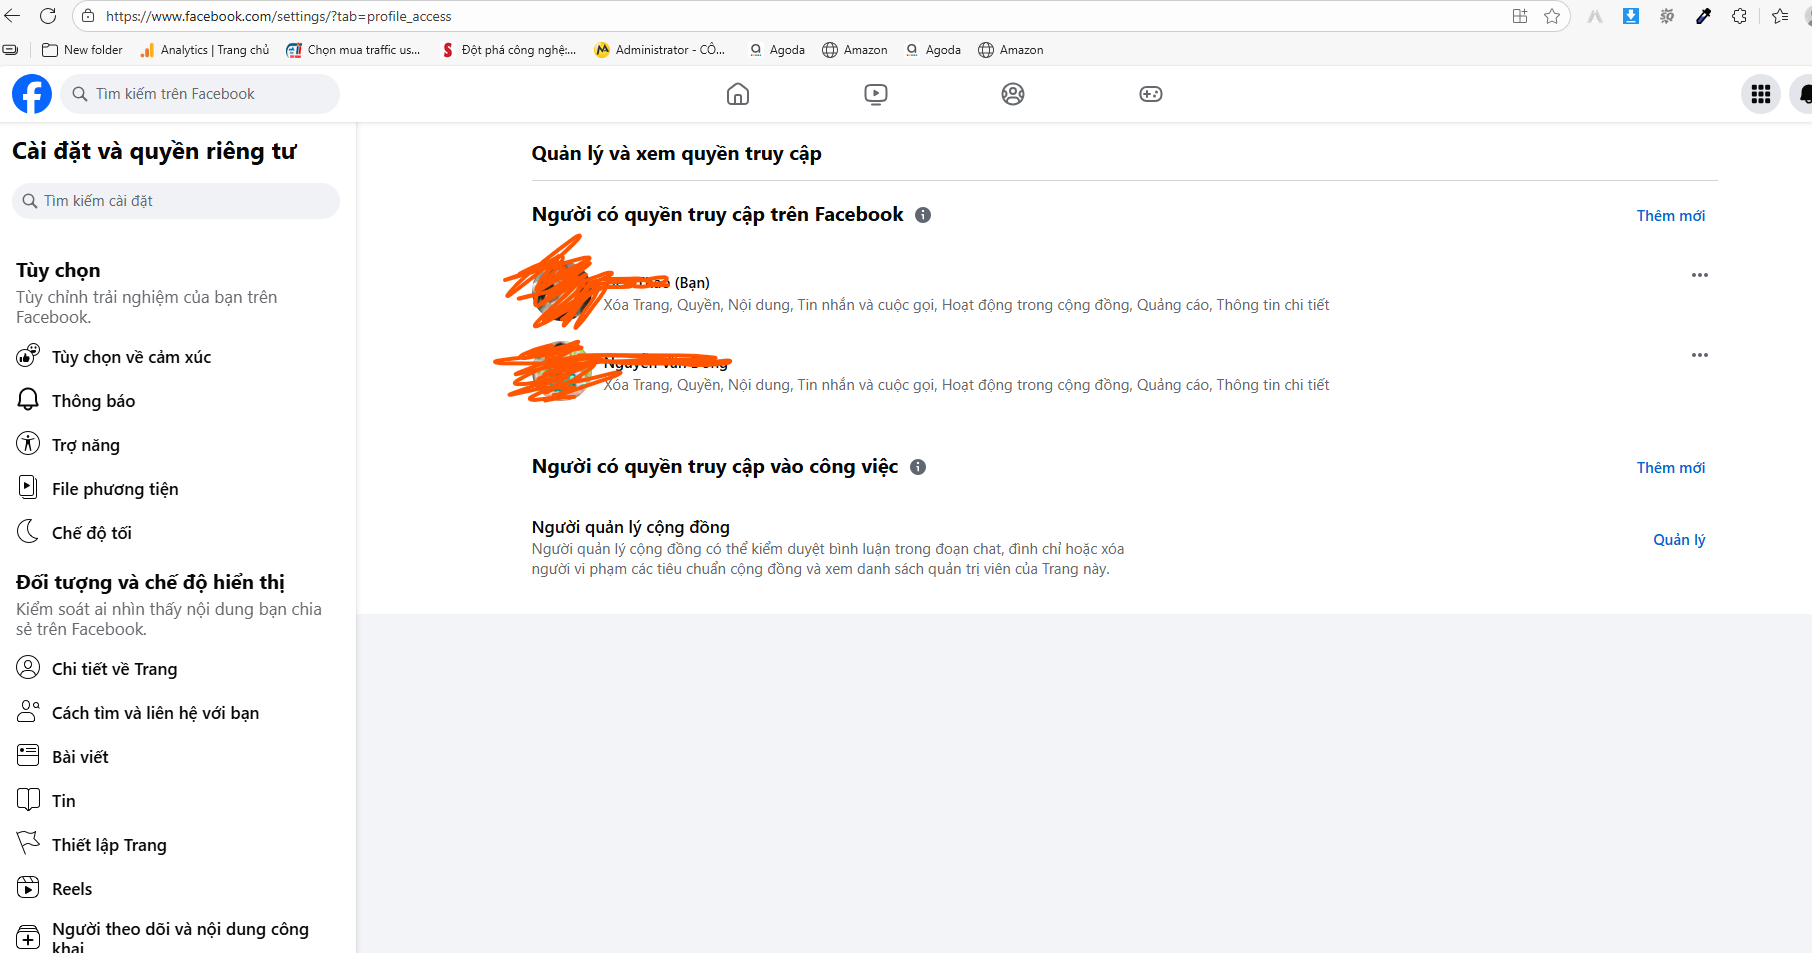
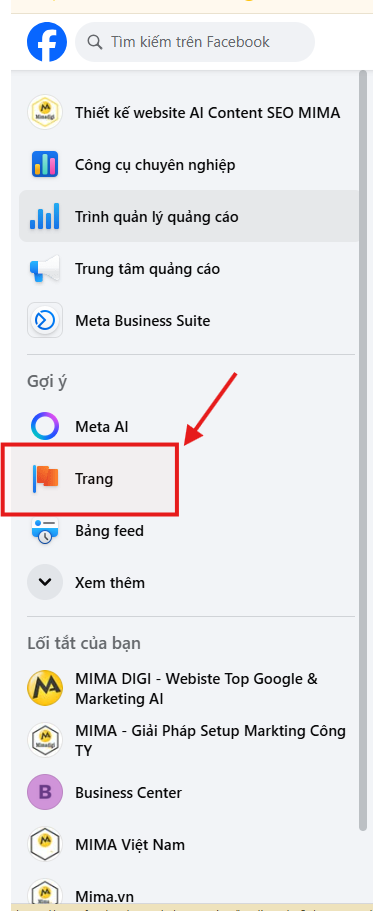
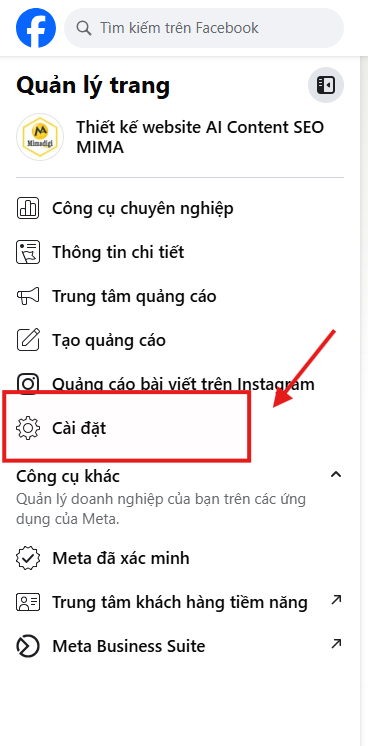
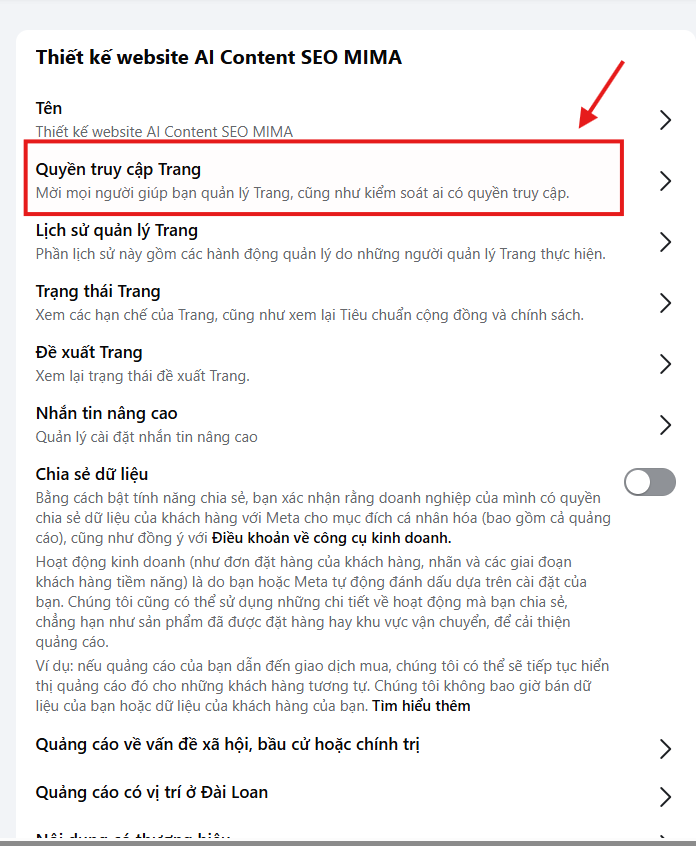
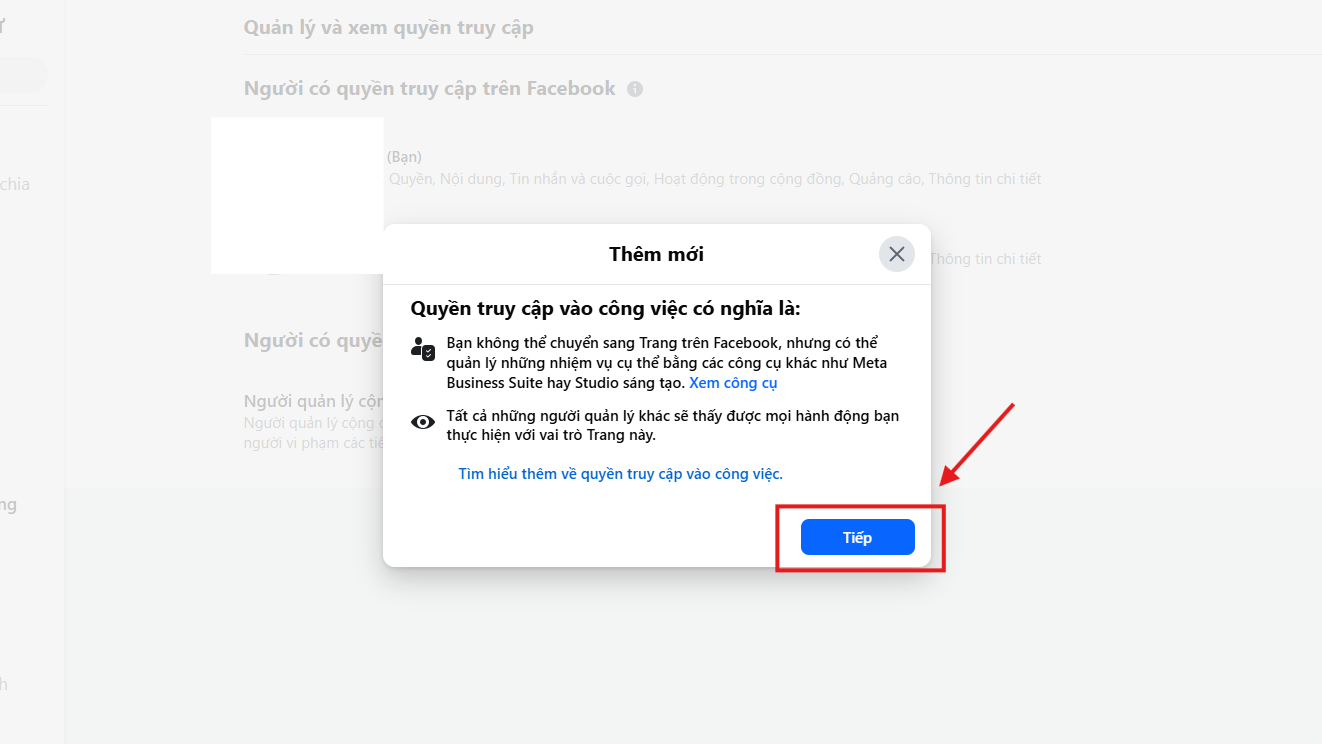
- Step 1: Go to your Fanpage and click the arrow icon in the upper right corner, select "Settings".
- Step 2: Select "Page Roles" from the menu on the left.
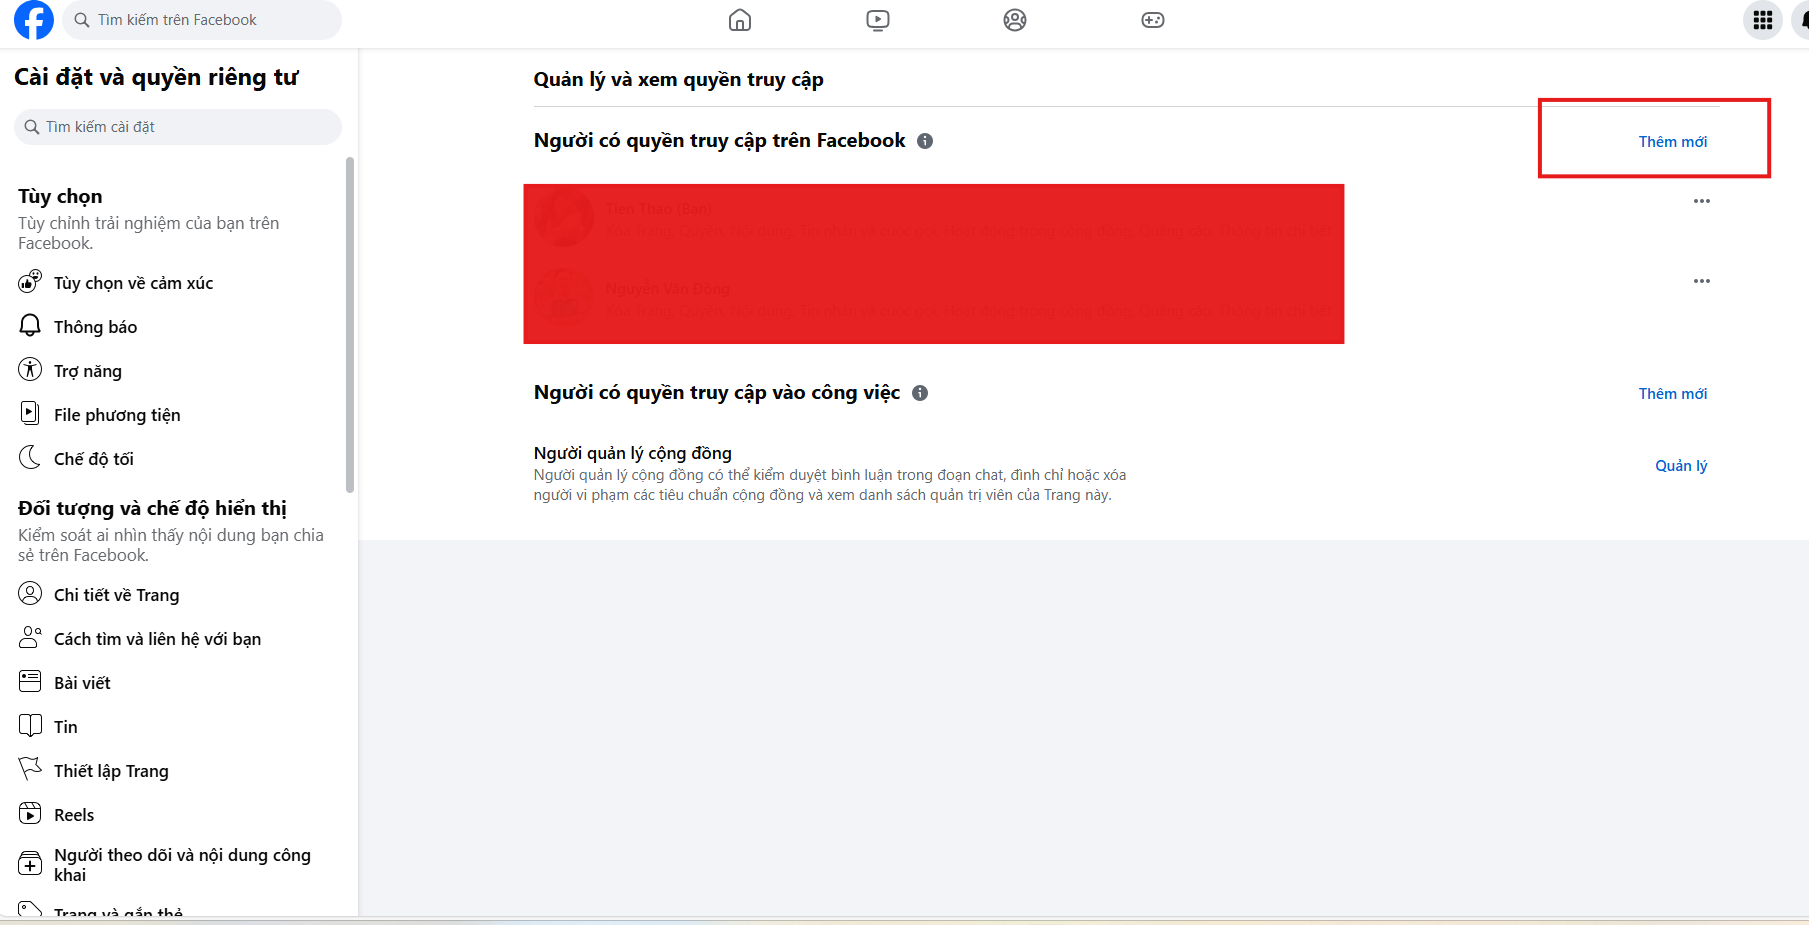
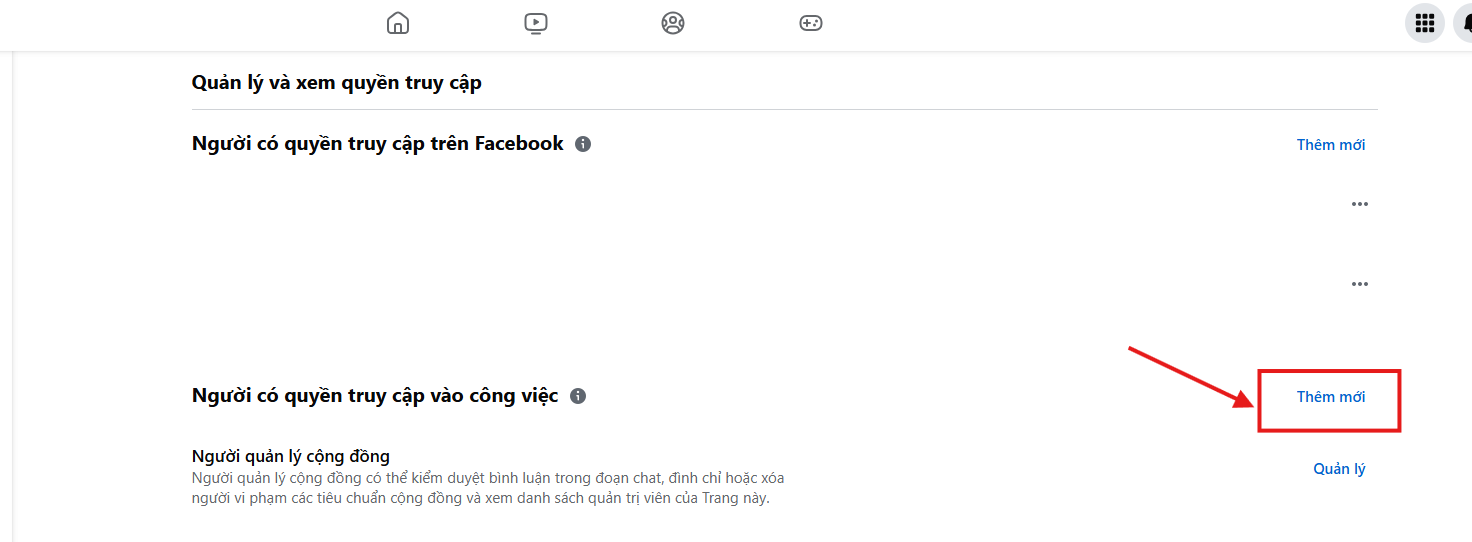
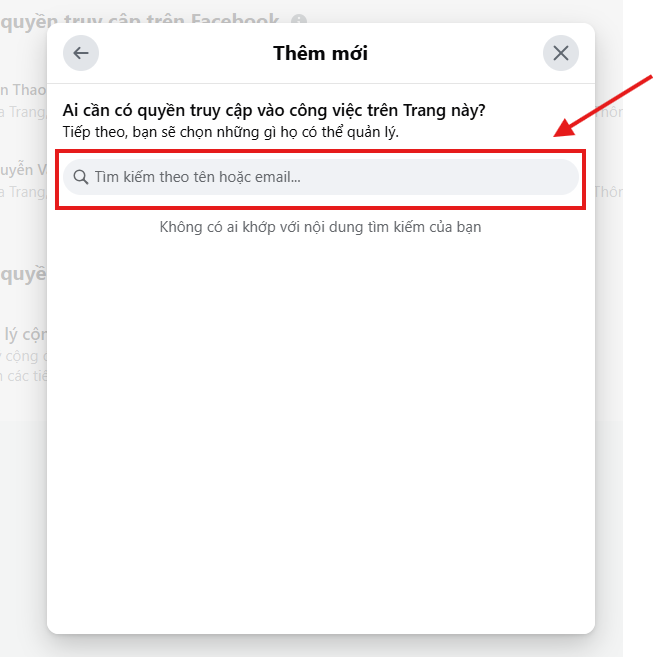
- Step 3: Click "Add Person" and enter the name or email of the person you want to grant permission to.
- Step 4: Choose a role (Admin, Editor, Advertiser, Content Creator) and click "Assign".
- Step 5: Enter your Facebook account password to confirm and complete the permission assignment process.
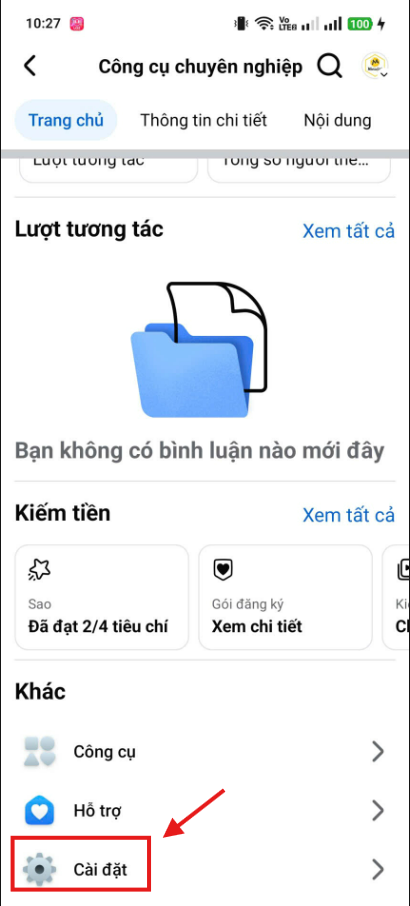
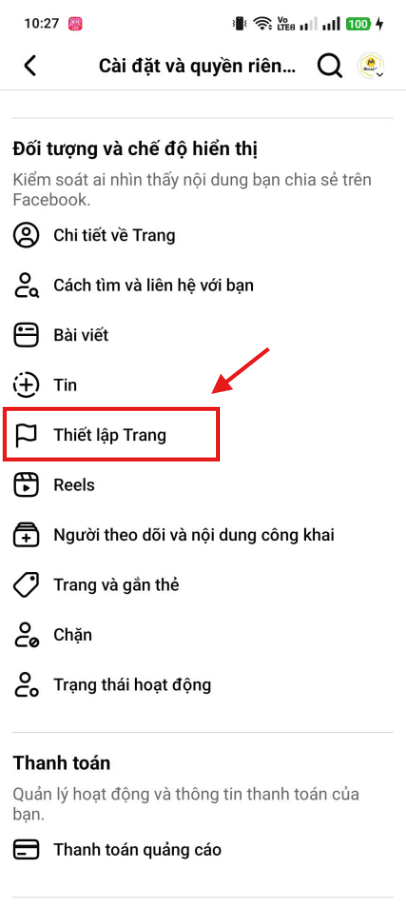
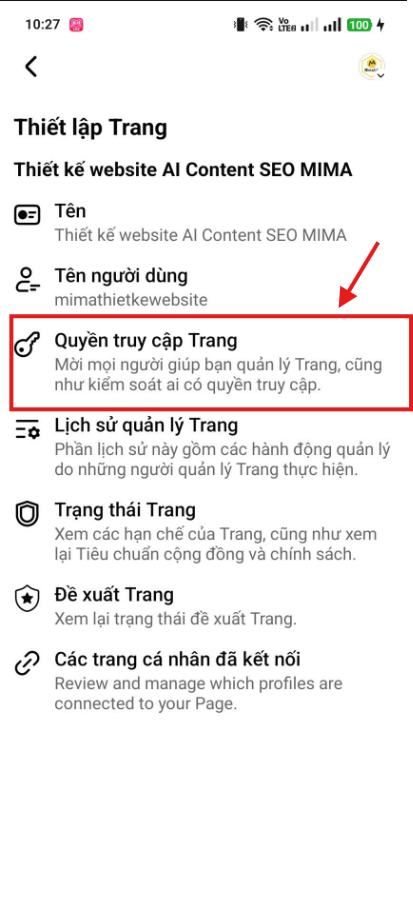
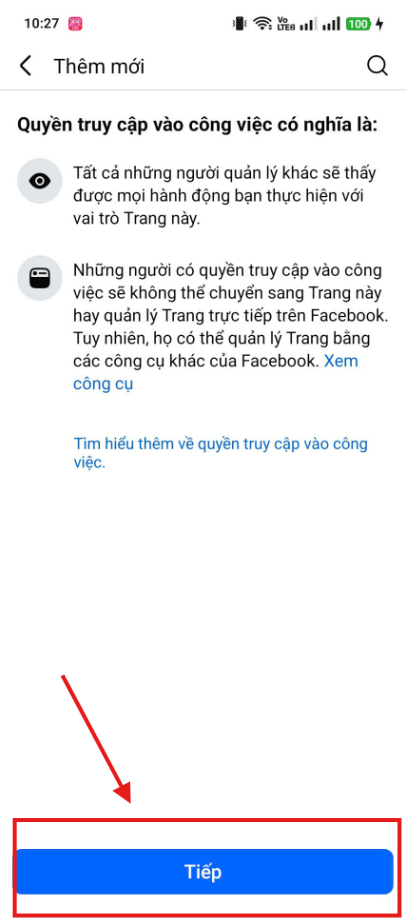
Assigning Fanpage Management Permissions on a Phone
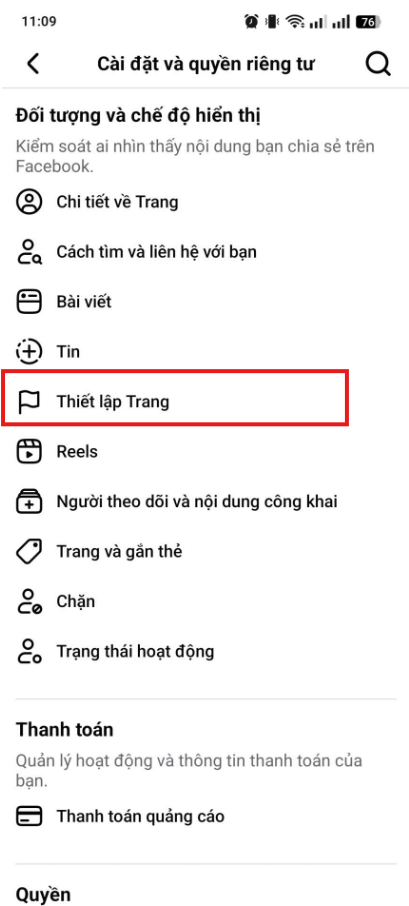
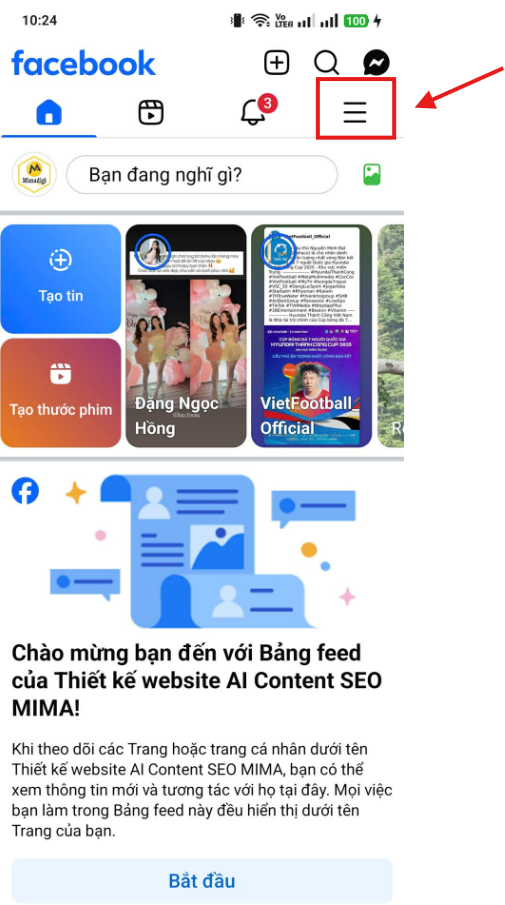
- Step 1: Open the Facebook app and go to your Fanpage.
- Step 2: Tap on "Settings", then select "Page Roles".
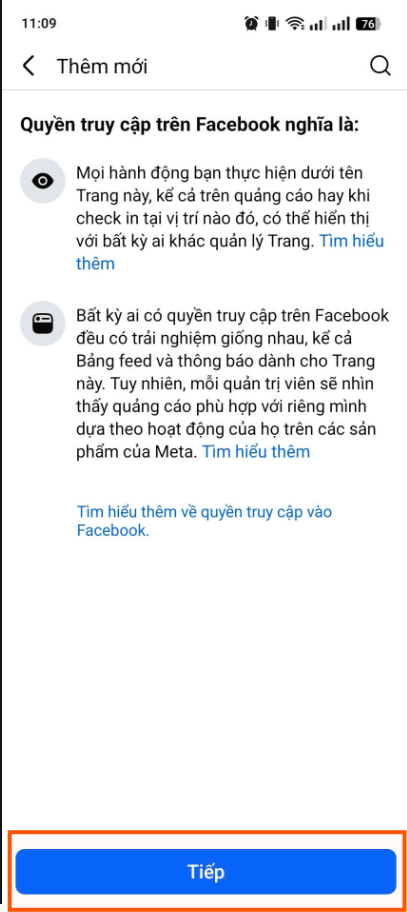
- Step 3: Tap "Add Person" and enter the information of the person you want to grant permission to.
- Step 4: Choose the appropriate administrative role and complete the password entry process to confirm.


Important Notes When Assigning Permissions
- Restrict access: Only grant permissions to those who are responsible and truly necessary. Avoid assigning permissions too broadly, as this can lead to a lack of control and cause unwanted incidents.
- Choose trustworthy administrators: Choose people who have experience and knowledge of the Fanpage to manage the page. Do not give rights to inexperienced or irresponsible people.
- Monitor regularly: After assigning permissions, you need to monitor the activities of the Fanpage to ensure that the administrators perform their roles correctly and do not affect the image of the business.
Creating and assigning Fanpage management permissions on Facebook is an integral part of a business's marketing strategy. When assigning permissions appropriately and monitoring regularly, you will optimize activities on the Fanpage, from interacting with customers to advertising products. Make sure to only grant permissions to people who are truly responsible to protect the security and development of the business.
Adding Permissions for Fanpage Editors
Assigning editor permissions on a computer
- Open Facebook and go to the Fanpage: Log in to your Facebook account and go to the fanpage you want to add an editor to.
- Select Settings: In the upper right corner of the fanpage, you will see a gear icon (settings). Click on it.
- Select "Page Roles": In the left control panel, select "Page Roles".
- Add Editor: In the "Assign a new Role to Page" section, enter the name or email of the person you want to add editor permissions to.
- Select Editor Role: After entering the name or email, in the "Select a role" section, select Editor. This role allows that person to manage posts, ads, and other features of the page without having the ability to manage page settings or add/remove other roles.
- Click "Add": After selecting the role, click the "Add" button to complete. Facebook will ask you to enter your password to confirm the change.
- Confirm permission: The added person will receive a notification and can start working as an editor on your fanpage.


Assigning editor permissions on a phone
- Open the Facebook app: Log in to your Facebook account on your phone and go to the fanpage you want to assign permissions to.
- Go to Fanpage Settings: In the fanpage interface, click on the three-line icon (menu) in the lower right corner (for iOS) or the upper right corner (for Android).
- Scroll down and select "Page Settings".
- Select "Page Roles": In the settings section, find and select "Page Roles".
- Add editor: In the "Assign a new Role to Page" section, you will see the name or email entry box.
- Enter the name or email of the person you want to add as an editor.
- Select Editor role: After entering the name or email, click on the role selection box and select "Editor".
- Click "Add": After selecting the role, click on "Add". Facebook will ask you to enter your password to confirm the change.
- Confirm permission: The added person will receive a notification and can start working as an editor on your fanpage.


Contact Information:
- MIMA Trading and Service Company Limited
- Tax code: 0318672839
- Address: 31/3B Hamlet 43, Dong Thanh Commune, Ho Chi Minh City
- Hotline: 0909 035 333
- Email: info@mimadigi.com
- Website: https://mimadigi.com/
We wish you success in managing your Fanpage and developing your brand on Facebook!


Share your review