


A Quick and Accurate Guide to Setting Up OneMail Email on MacOS Mail
Setting up your business email on the MacOS Mail app offers more convenient work management, faster data synchronization, and eliminates the need to access webmail for every use.
Below is a detailed guide on how to set up your OneMail account on MacOS Mail in just a few simple steps.
Steps to Set Up OneMail Email on MacOS Mail
Step 1: Open the Mail App on MacOS
- Access the Mail application available on your Mac.
- On the main interface, select "Add Account".
- Choose "Other Mail Account..." to proceed with adding your business email.
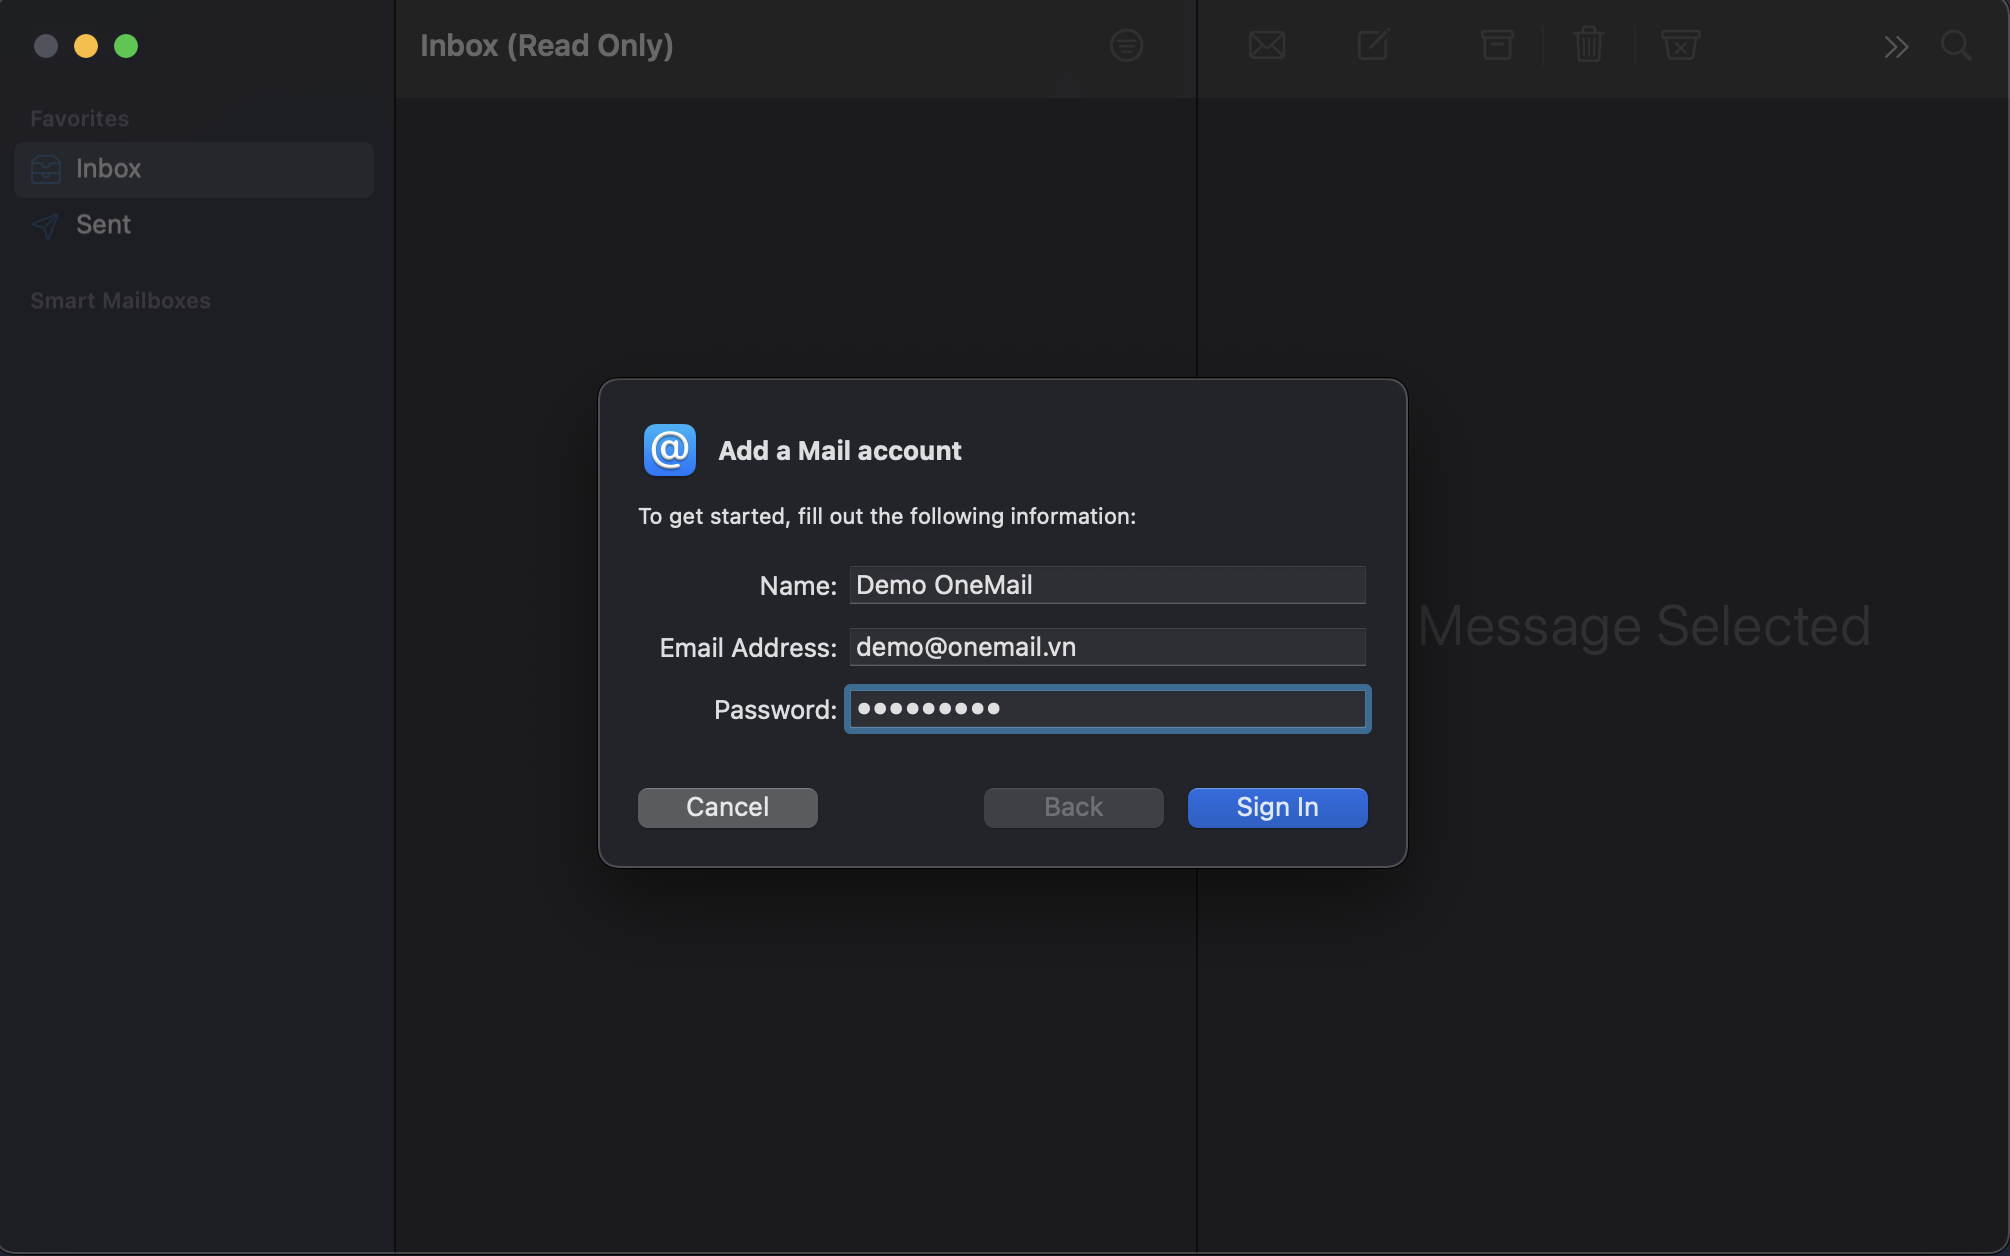
Step 2: Enter Account Information
You need to fill in all the following details:
- Name: Display Name
- Email Address: Business Email Address
- Password: Email Password
→ Click "Sign In" to continue.
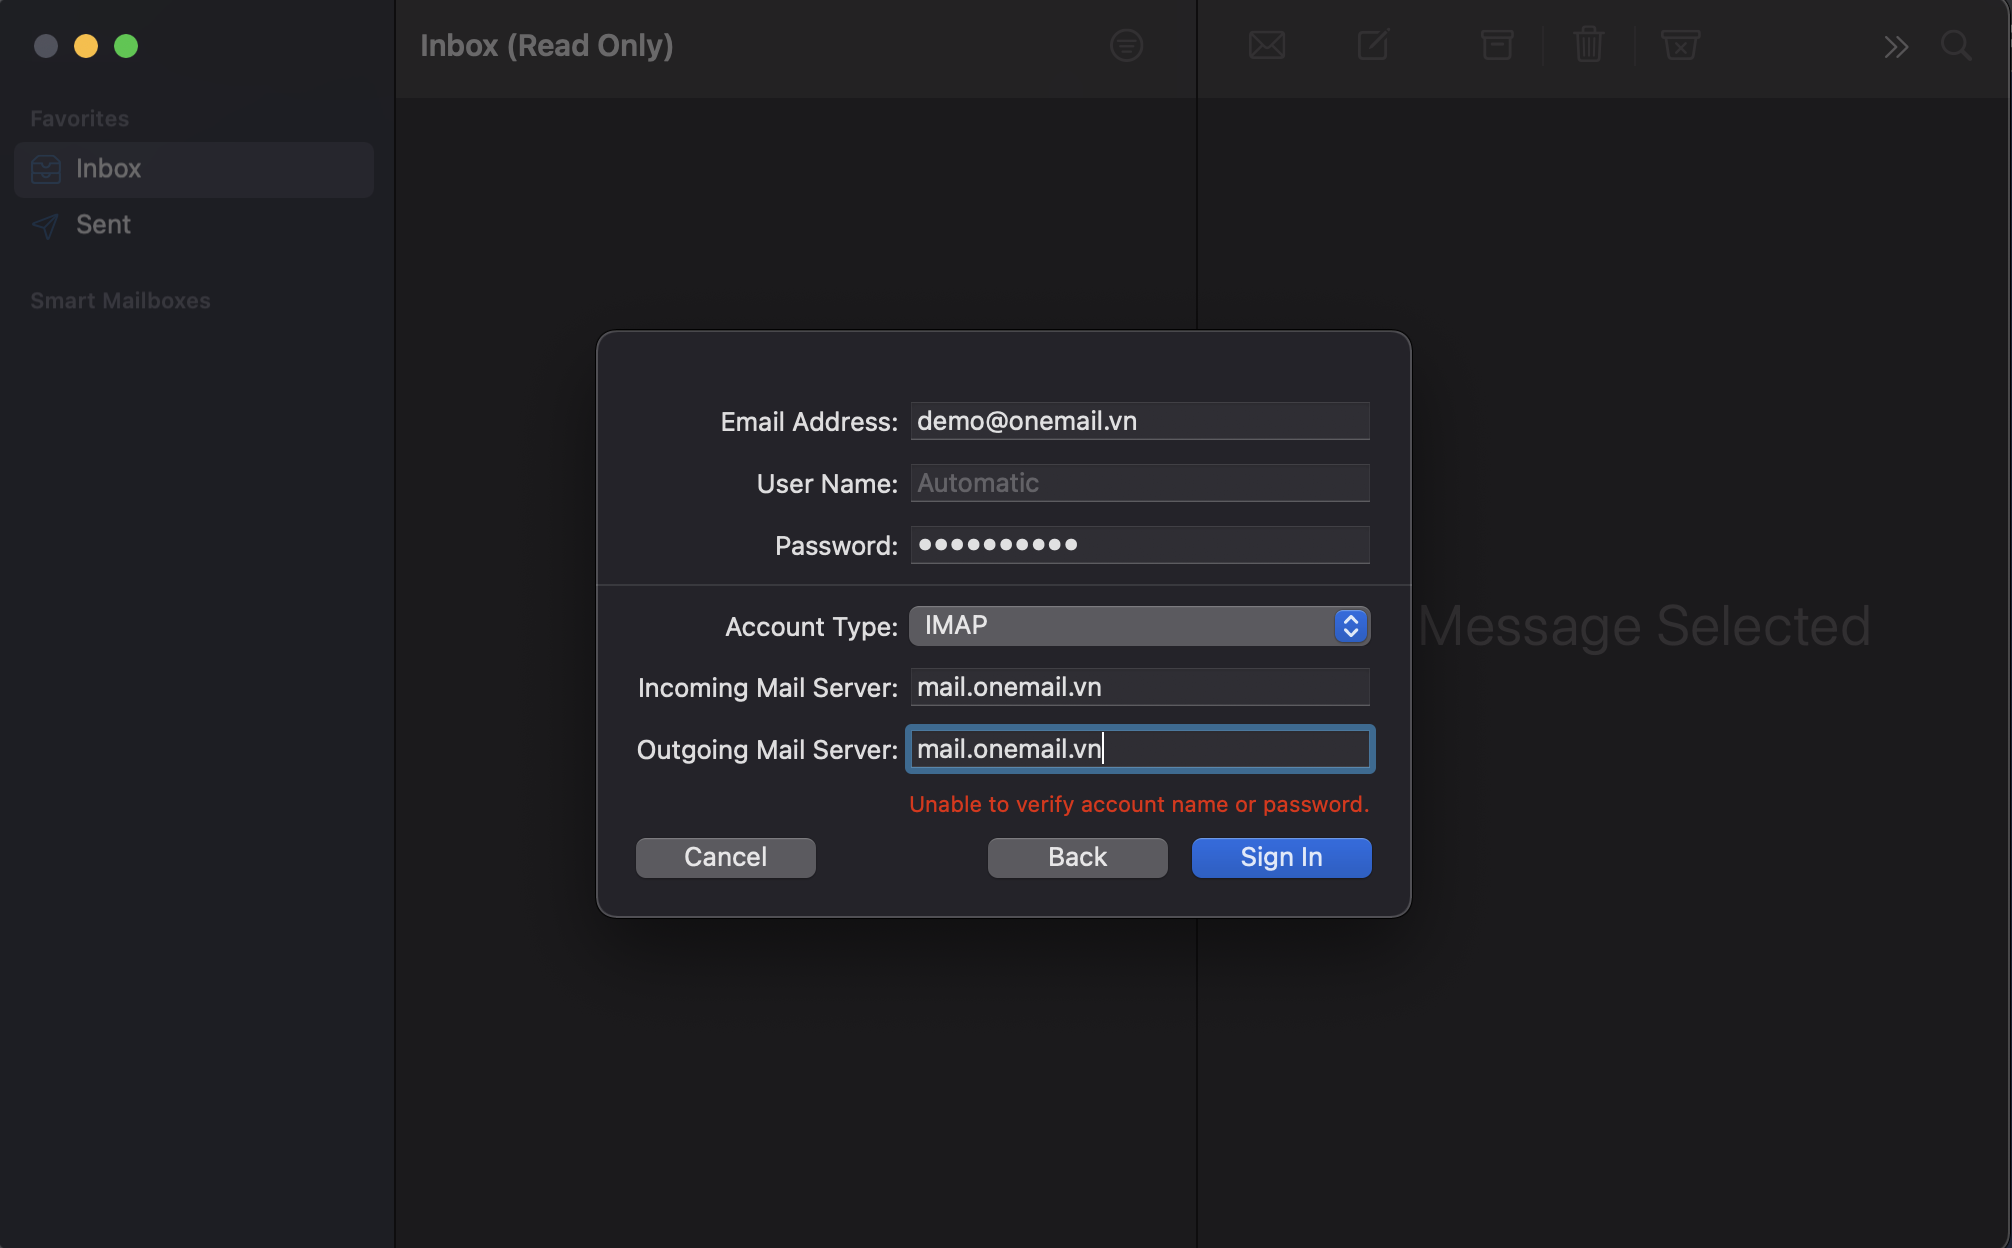
Step 3: Configure Email Server (If Necessary)
If the system does not automatically detect the configuration, you will need to enter it manually:
Incoming Mail Server
- Server: mail.yourdomain.com
- Username: Full Email Address
- Password: Password
Outgoing Mail Server
- Server: mail.yourdomain.com
- Username: Email Address
- Password: Password
👉 Important Note:
The email server must be mail.yourdomain.com; do not use webmail.yourdomain.com to avoid connection errors.
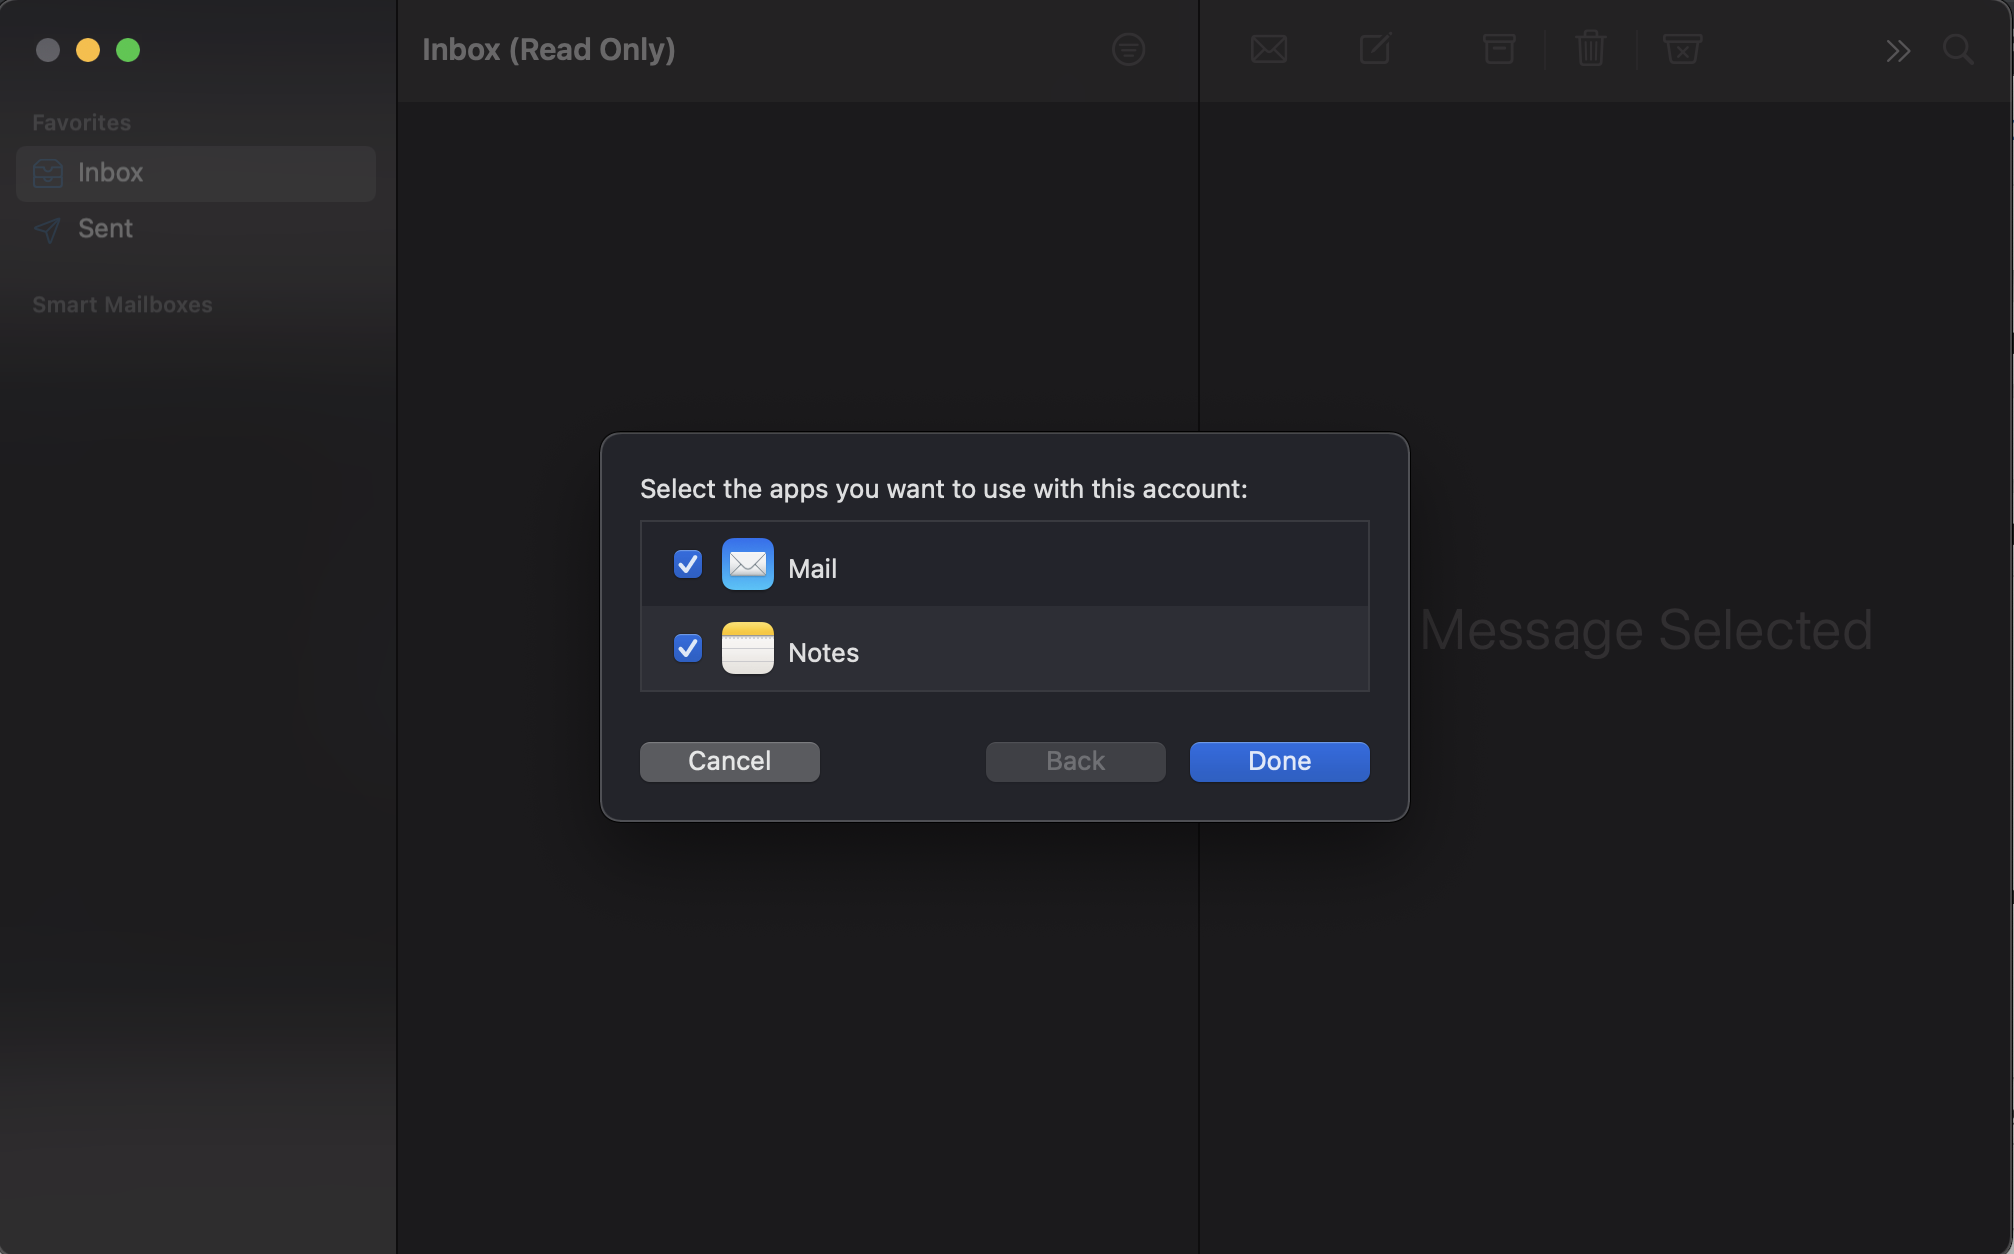
Step 4: Select Data to Sync
After successful configuration, the system will display the following options:
- Notes
It is recommended to select both to ensure full data synchronization.
→ Click "Done" to complete the setup.
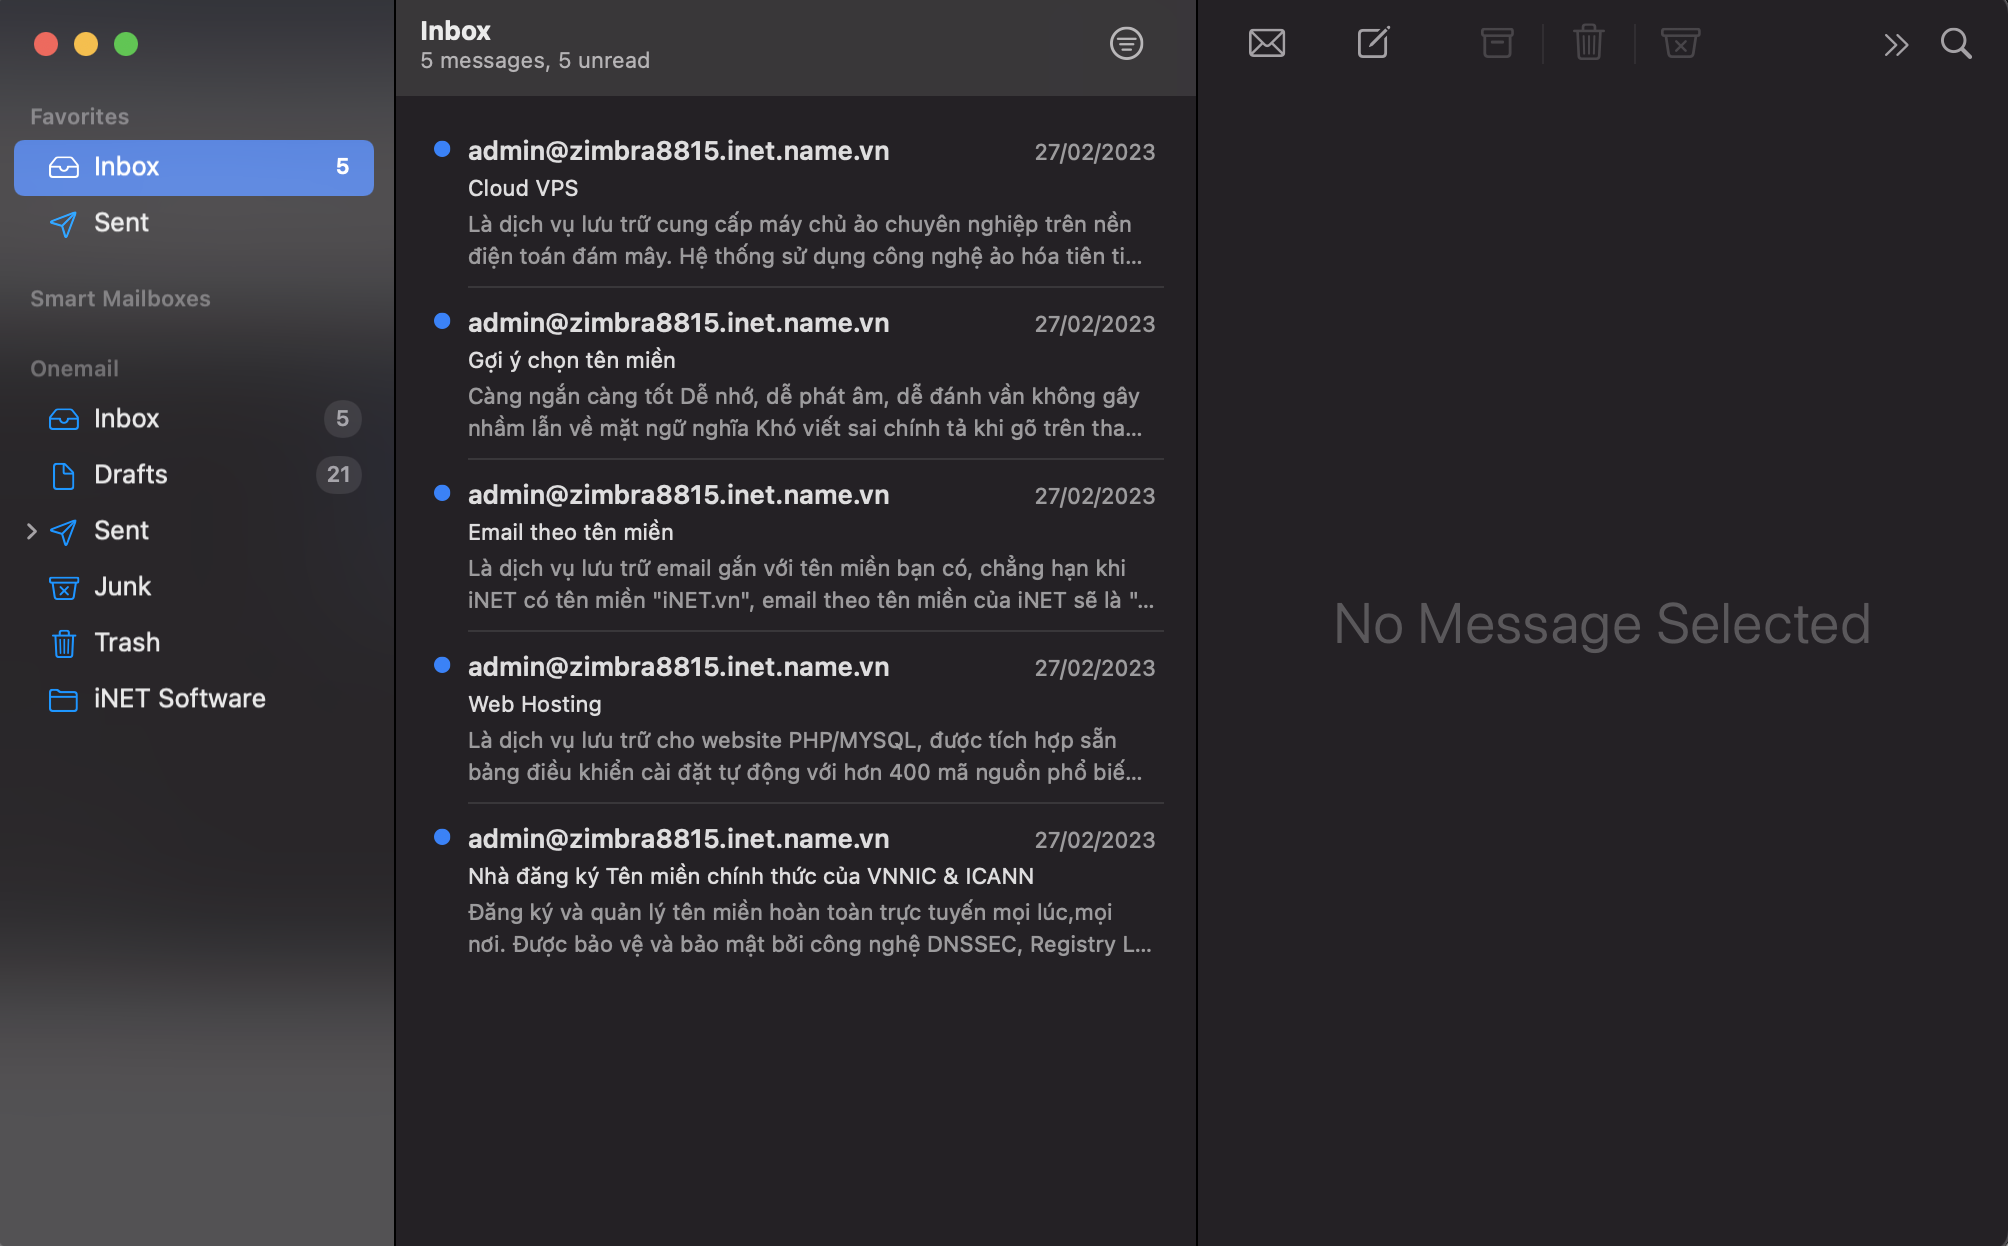
Completion and Usage
After completion, your email will be automatically synchronized to the Mail app on MacOS. You can:
- Send and receive emails instantly.
- Manage emails directly on your computer.
- Receive notifications for new mail.
Important Notes
To ensure your email works stably, you should:
- Enter the correct server information: mail.yourdomain.com
- Double-check your password if you cannot log in.
- Ensure a stable internet connection.
- Delete old emails if your inbox is full.
When to Recheck Configuration?
You should recheck your settings in the following situations:
- Cannot send or receive emails.
- Emails are not syncing.
- Email password has been changed.
- Switching hosting providers or mail servers.
Support from MIMADIGI
If you need assistance with setup or encounter any issues while using your business email, please contact us:
MIMADIGI
- Address: 31/3B Thoi Tu 1 Hamlet, Dong Thanh Commune, Ho Chi Minh City
- Hotline: 0909 035 333
- Email: info@mimadigi.com
- Website: https://mimadigi.com/


Share your review